You determine the page size by the size you are finally going to print.
Always goto 'MORE OPTIONS'
This will send you to the 'BLEED'
Before you start your design, you should always talk to your printer. you should talk about stock, spot colour etc. Just to make sure you have everything in order. The standard bleed is 3MM.
The SLUG is the boarder or space OUTSIDE the margin.
Add 20MM just do yo can see it.
This is what your 'New Document' box should look like before you start.
USING COLOUR.
When your applying colour in indesign, it always has to be applied in a frame.
New Colour Swatches is the same as Photoshop and Illustrator.
To create a tint swatch in Indesign is a little different but a little easier. its just under 'NEW SWACH COLOUR'
The preperation is always very important in indesign. ONE THING that is common that goes wrong at the printers is links being lost from other programs
PHOTOSHOP:
- ALWAYS CHANGE YOUR IMAGES TO CYMK. GRAYSCALE FOR BLACK AND WHITE.
- MAKE SURE THE RESOLUTION IS CORRECT : 300 DPI
- MAKE YOUR IMAGES THE ACTUAL SIZE
- PSD or TIFF
ILLUSTRATOR:
- AI- COPY AND PASTE
- CMYK
We then went to make a sure document, Everything is then set to default. The plan now is to place some images (COMMAND D)
this photo is a photoshop file. The nice thing is is the swatches from this image go into the swathes file.
When you place an image in indesign it doesn't become a indesign document. MAKE sure you put your different files (for example you photoshop files) in different folders (in finder that is)
ALWAYS GO TO OVERPRINT PREVIEW TO SEE THE IMAGES PROPERLY. THIS WILL MAKE THE IMAGES NOT PIXILATED.
content grabber- Selecting the image (so the boarder around the image turn brown instead of blue. Then go to swatches and change the colour ('A FAKE MONOCHROME')
There is a quick way to edit an image once in indesign. SIMPLY GO TO LINKS AND UPDATE, say you want to edit an image in indesign, go to the original program where the image belongs, edit it, save it. Then go to LINKS IN INDESIGN and you will notice there will be an exclamation mark next to the link image you just optimised. Double click it and it will sort its-self out.
To get rid of your background use the magic wand tool.
after optimising, always make sure you save the image as a psd file, so if you decide to edit it again you can simply got back on to photoshop with the file.
What happens to you indesign file when sending it to the printer. What happens to the COLOURS?
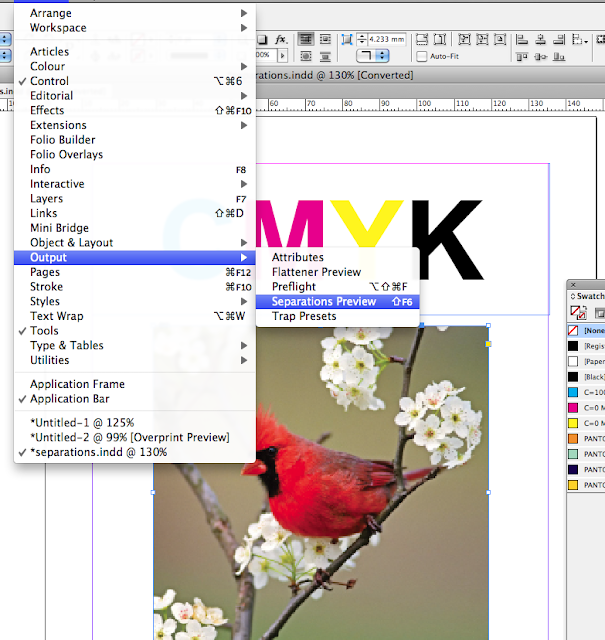
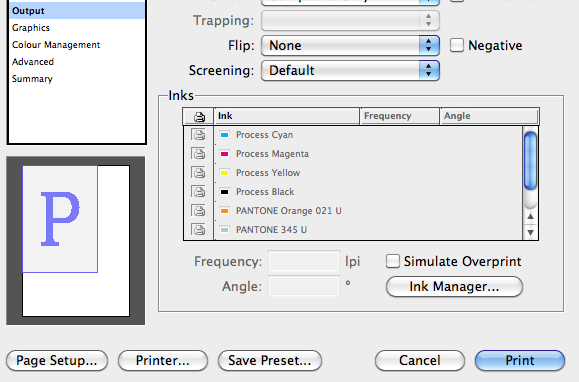
How do you get sepretate colour (CMYK) from our indesign file?
When it comes to printing, this is where you can change or make sure all your colours are ok. This is a good way to organise something to be screen printed too as you can change the colours to suit.
KNOCKING OUT AND OVERPRINTING :
when would we use overprint stroke? TRAPPING is overlaying spot colours
Trapping is a term most commonly used in the prepress industry to describe the compensation for misregistration between printing units on a multicolor press. This misregistration causes unsightly gaps or white-space on the final printed work. Trapping involves creating overlaps (spreads) or underlaps (chokes) of objects during the print production process to eliminate misregistration on the press. - http://en.wikipedia.org/wiki/Trap_(printing)


No comments:
Post a Comment